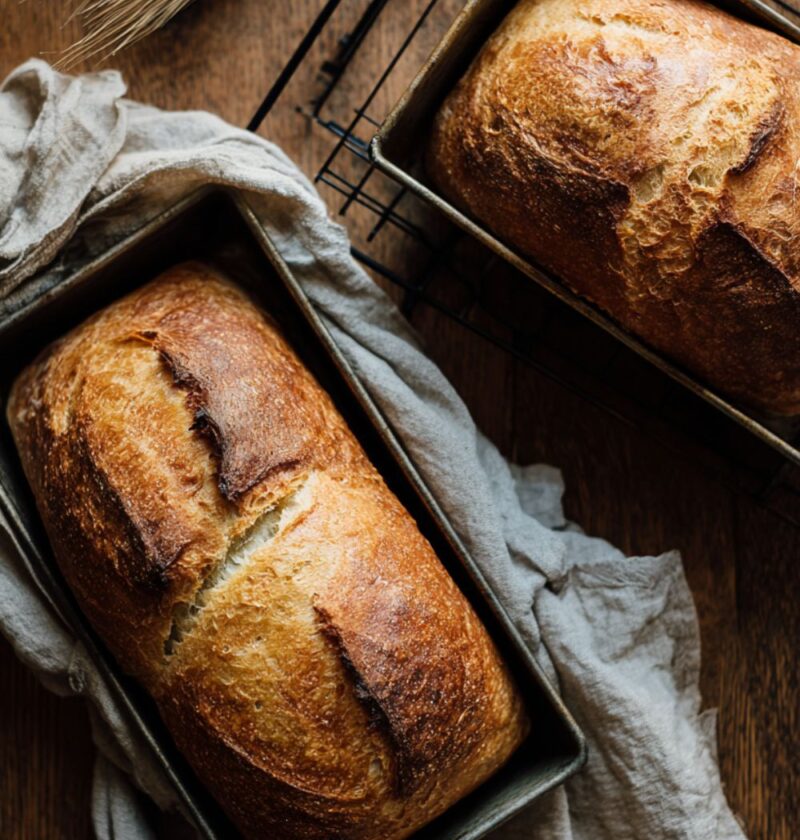
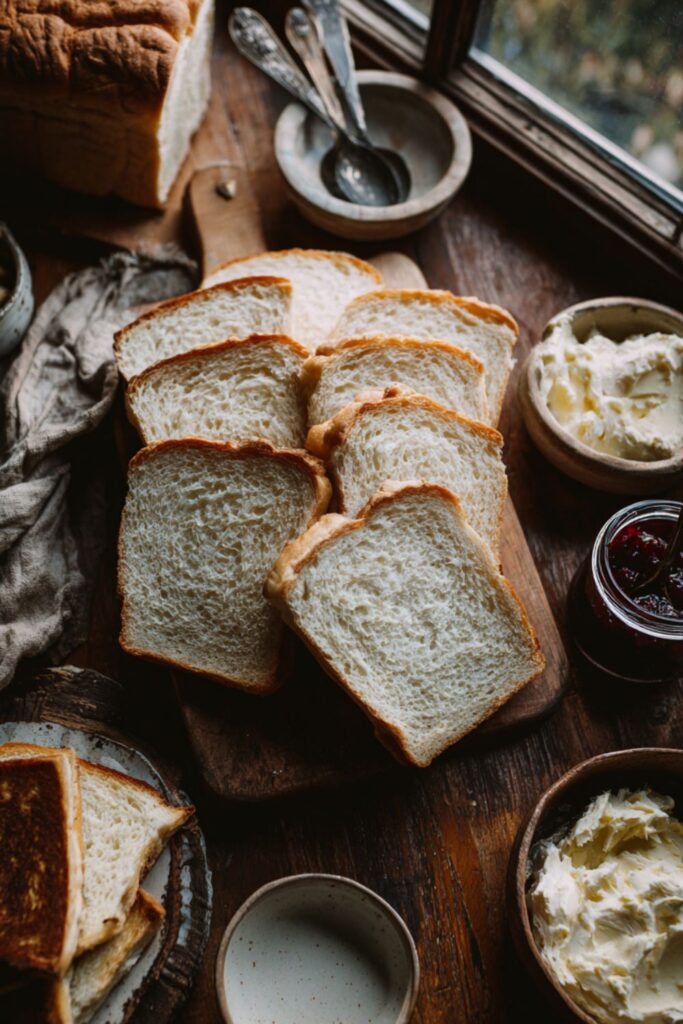
Pioneer Woman White Sandwich Bread is made with active dry yeast, all-purpose flour, warm whole milk, butter, a touch of sugar, and salt. The result is a tender, fluffy, and slightly sweet loaf with a golden-brown crust. It is the perfect foundation for any sandwich, from PB&J to grilled cheese, and makes two genero
Try More Recipes:
Jump to Recipe🧡 Why You Will Love This White Sandwich Bread:
- Incredibly Soft and Fluffy: Using whole milk and softened butter in the dough creates a tender, fine crumb that makes this bread perfect for soft sandwiches or simply tearing apart and eating plain.
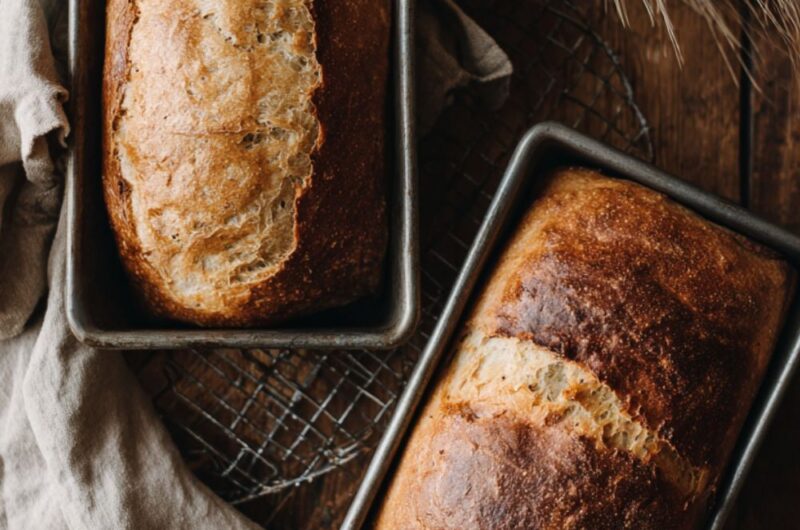
- Double the Yield: This recipe makes two full loaves, which is perfect for batch baking. You can keep one out for immediate use and slice and freeze the second one for later, saving you time.
- Superior to Store-Bought: Nothing beats the aroma and flavor of fresh, homemade bread. It has a natural, slightly sweet taste and none of the strange preservatives found in commercial loaves.
- The Perfect Canvas: This is your foundation for endless meals. It works perfectly toasted with jam, sliced thick for French toast, or used to make the best, fluffiest grilled cheese sandwich.
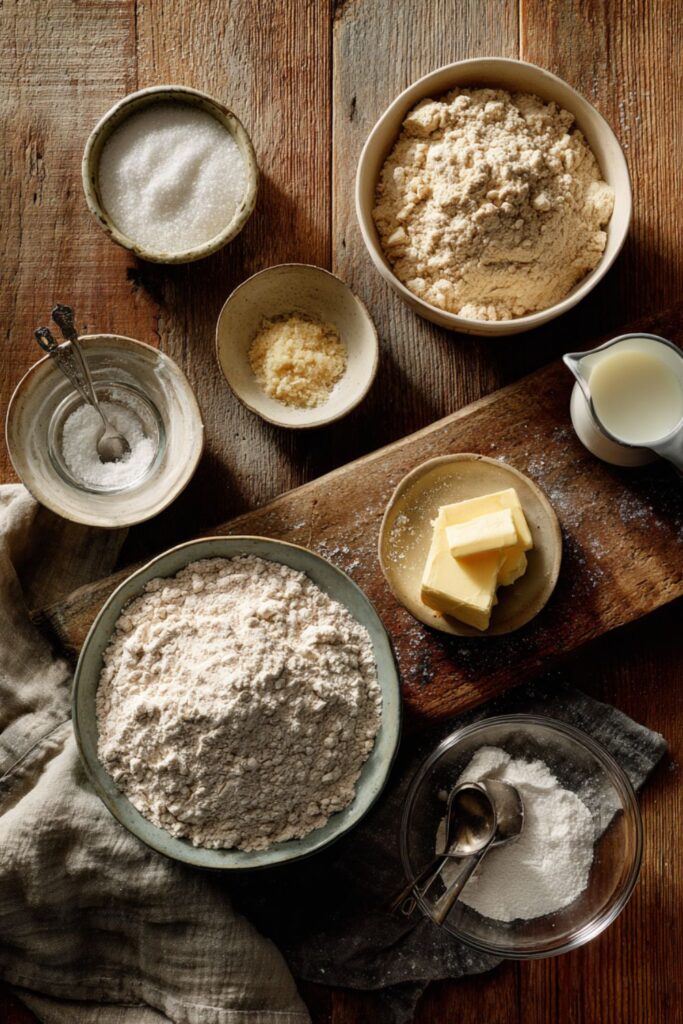
🧈 Pioneer Woman White Sandwich Bread Ingredients
For the Yeast:
- 2 1/4 teaspoons active dry yeast (one packet)
- 1 tablespoon granulated sugar
- 1/2 cup warm water
For the Dough:
- 4 1/2 cups all-purpose flour, divided
- 2 tablespoons granulated sugar
- 1 teaspoon salt
- 1 cup whole milk, warmed
- 1/4 cup unsalted butter, softened
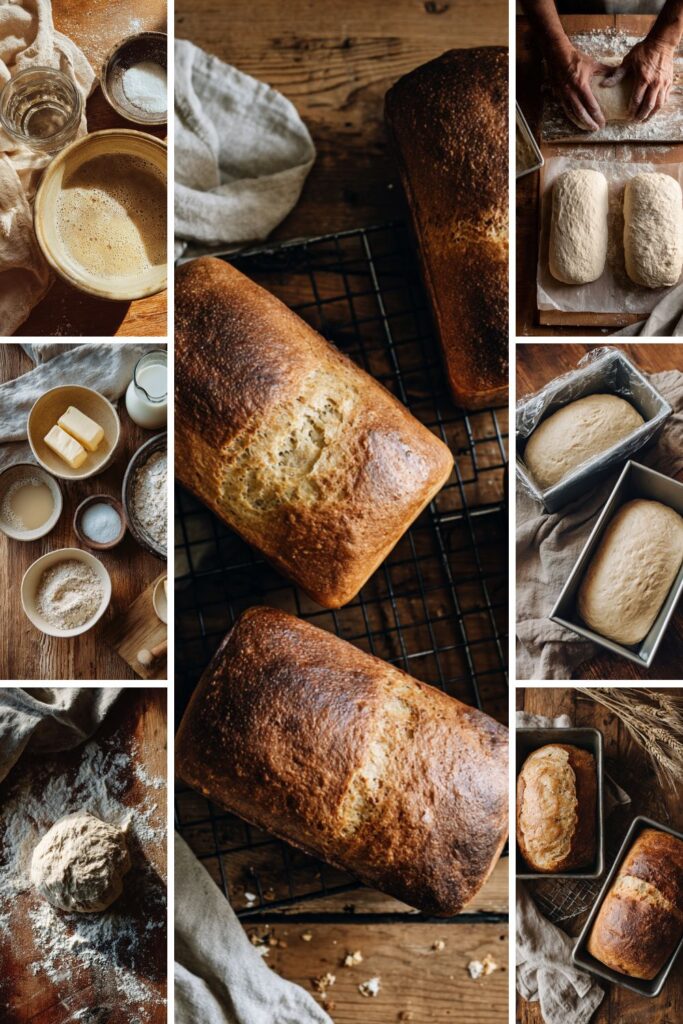
🍞 How To Make Pioneer Woman White Sandwich Bread
- Activate the yeast: In a small bowl, combine the yeast, 1 tablespoon of sugar, and the warm water. Let it sit for 5 to 10 minutes until the mixture is bubbly and foamy. This shows the yeast is alive.
- Combine the main ingredients: In a large mixing bowl or the bowl of a stand mixer, whisk together 3 cups of the flour, the remaining 2 tablespoons of sugar, and the salt. Add the warm milk, softened butter, and the foamy yeast mixture.
- Mix the dough: Use a wooden spoon or the dough hook attachment to mix the ingredients until just combined. Gradually add the remaining 1 1/2 cups of flour, mixing until the dough pulls away from the sides of the bowl.
- Knead the dough: Turn the dough out onto a lightly floured surface. Knead the dough for 6 to 8 minutes until it is smooth and elastic. If using a stand mixer, knead for 5 minutes.
- First rise (Proofing): Place the dough in a lightly oiled bowl, turning once to coat. Cover the bowl with plastic wrap and let it rise in a warm, draft-free place for 1 to 1 1/2 hours, or until the dough has doubled in size.
- Shape the loaves: Punch the risen dough down gently to release the air. Divide the dough in half. Pat each half into a rectangle and roll it up tightly, pinching the seam closed. Place both dough logs into two greased 9×5-inch loaf pans.
- Second rise: Cover the loaf pans loosely with plastic wrap. Let the loaves rise in a warm place for 30 to 45 minutes, or until the dough has almost doubled in size and crests over the top of the pan.
- Bake: Preheat your oven to $375^{circ}text{F}$ ($190^{circ}text{C}$). Bake for 25 to 30 minutes until the tops are golden brown. Tap the top; if it sounds hollow, the bread is done.
- Cool: Immediately remove the loaves from the pans and let them cool completely on a wire rack before slicing.
💭Recipe Tips
- Check Yeast Water Temperature: The water for the yeast must be warm, but not hot. Water that is too hot will kill the yeast, and water that is too cold will prevent it from activating. Aim for a temperature that is comfortably warm to the touch.
- Kneading is Essential: Unlike quick breads, yeast breads require kneading.1 This process develops the gluten, which creates the soft, chewy texture and the structure needed for the bread to rise high and hold its shape.2
- The Hollow Sound Test: The best way to check if the loaf is fully baked is to tap the bottom crust. If it sounds hollow, the inside is cooked. If it sounds dull, it needs a few more minutes.
- Cool Completely Before Slicing: Slicing the bread while it is still warm causes the starches to compress, resulting in a gummy, dense texture. Let it cool fully—the wait is worth it!
🍯 What To Serve With White Sandwich Bread?
This soft, classic bread is the ultimate foundation for all your favorite meals use it for a classic grilled cheese sandwich, buttered toast with homemade strawberry jam, or cut into cubes for croutons. It is also the perfect accompaniment to hearty soups and stews.
🎚 How To Store Leftovers White Sandwich Bread?
- Store: Once the bread has cooled completely, store it in a bread bin, a large zip-top bag, or wrapped loosely in a kitchen towel at room temperature for 3 to 4 days.
- Freeze: Slice the bread first, then place the slices in a freezer bag. Remove as much air as possible. It can be frozen for up to 3 months. When ready to eat, simply pull out the slices you need and toast them.
🥵 How To Reheat Leftovers White Sandwich Bread?
The key to reheating homemade bread is preserving the soft, tender crumb while gently warming it through.
1. In the Oven or Toaster Oven (Best for Whole Loaf)
This method gently warms the bread and is the safest way to prevent drying.
- Preheat: Set your oven to a low heat, about 350°F.
- Wrap: Wrap the whole loaf or a thick slice tightly in aluminum foil. The foil traps the bread’s moisture, keeping the interior soft.
- Heat: Bake for 10–15 minutes (whole loaf) or 5–7 minutes (thick slice).
2. Quick Microwave Refresh (Use Caution)
Use this only for speed, as microwaving can risk making the bread tough.
- Wrap a single slice in a damp paper towel.
- Heat on high for 10–15 seconds. This is just enough to soften the interior without overcooking the gluten.
3. In a Skillet (For Crispy Slices)
This method is perfect for day-old slices intended for toast or grilled cheese.
- Melt a pat of butter in a non-stick skillet over medium heat.
- Grill the slice for 1–2 minutes per side until it is warm and has a crisp, buttery exterior.
FAQs
The most common reasons are using water that was too hot (killing the yeast) or having old, inactive yeast. Always check that your yeast foams up before mixing it into the full batch of flour.
Yes you can skip the initial activation step simply mix the instant yeast directly with the dry ingredients and then add the warm liquid. The total amount remains the same.
Standard all-purpose flour works perfectly for a soft, fluffy loaf. You can substitute 1 cup of the all-purpose flour with whole wheat flour if you prefer a slightly denser, healthier loaf.
More Recipes:
- Pioneer Woman Poppy Seed Chicken Casserole
- Pioneer Woman Potato Soup Recipe
- Pioneer Woman Potato Balls
📊 White Sandwich Bread Nutrition Facts
Serving Size: 1 slice (1/16 of one loaf)
- Calories: 120 kcal
- Total Fat: 3g
- Saturated Fat: 2g
- Cholesterol: 8mg
- Sodium: 160mg
- Total Carbohydrate: 20g
- Dietary Fiber: 1g
- Sugars: 3gµ
- Protein: 4g
Pioneer Woman White Sandwich Bread
Course: Sides, Breakfast, Brunch, Dinner, LunchCuisine: AmericanDifficulty: Beginner32
servings20
minutes30
minutes120
kcalPioneer Woman White Sandwich Bread is made with active dry yeast, all-purpose flour, warm whole milk, butter, a touch of sugar, and salt. The result is a tender, fluffy, and slightly sweet loaf with a golden-brown crust. It is the perfect foundation for any sandwich, from PB&J to grilled cheese, and makes two genero
Ingredients
2 1/4 teaspoons active dry yeast (one packet)
1 tablespoon granulated sugar
1/2 cup warm water
- For the Dough:
4 1/2 cups all-purpose flour, divided
2 tablespoons granulated sugar
1 teaspoon salt
1 cup whole milk, warmed
1/4 cup unsalted butter, softened
Directions
- Activate the yeast: In a small bowl, combine the yeast, 1 tablespoon of sugar, and the warm water. Let it sit for 5 to 10 minutes until the mixture is bubbly and foamy. This shows the yeast is alive.
- Combine the main ingredients: In a large mixing bowl or the bowl of a stand mixer, whisk together 3 cups of the flour, the remaining 2 tablespoons of sugar, and the salt. Add the warm milk, softened butter, and the foamy yeast mixture.
- Mix the dough: Use a wooden spoon or the dough hook attachment to mix the ingredients until just combined. Gradually add the remaining 1 1/2 cups of flour, mixing until the dough pulls away from the sides of the bowl.
- Knead the dough: Turn the dough out onto a lightly floured surface. Knead the dough for 6 to 8 minutes until it is smooth and elastic. If using a stand mixer, knead for 5 minutes.
- First rise (Proofing): Place the dough in a lightly oiled bowl, turning once to coat. Cover the bowl with plastic wrap and let it rise in a warm, draft-free place for 1 to 1 1/2 hours, or until the dough has doubled in size.
- Shape the loaves: Punch the risen dough down gently to release the air. Divide the dough in half. Pat each half into a rectangle and roll it up tightly, pinching the seam closed. Place both dough logs into two greased 9×5-inch loaf pans.
- Second rise: Cover the loaf pans loosely with plastic wrap. Let the loaves rise in a warm place for 30 to 45 minutes, or until the dough has almost doubled in size and crests over the top of the pan.
- Bake: Preheat your oven to 375°F. Bake for 25 to 30 minutes until the tops are golden brown. Tap the top; if it sounds hollow, the bread is done.
- Cool: Immediately remove the loaves from the pans and let them cool completely on a wire rack before slicing.
Notes
- Check Yeast Water Temperature: The water for the yeast must be warm, but not hot. Water that is too hot will kill the yeast, and water that is too cold will prevent it from activating. Aim for a temperature that is comfortably warm to the touch.
Kneading is Essential: Unlike quick breads, yeast breads require kneading.1 This process develops the gluten, which creates the soft, chewy texture and the structure needed for the bread to rise high and hold its shape.2
The Hollow Sound Test: The best way to check if the loaf is fully baked is to tap the bottom crust. If it sounds hollow, the inside is cooked. If it sounds dull, it needs a few more minutes.
Cool Completely Before Slicing: Slicing the bread while it is still warm causes the starches to compress, resulting in a gummy, dense texture. Let it cool fully—the wait is worth it!